| February 7, 2020 | ||||||
Minimoto style 18 volt batteries Note: Here is how to make an 18 Volt Minimoto style battery |
|
|||||
| Materials
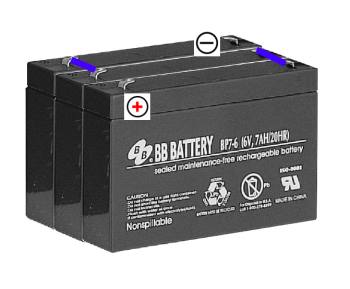
and tools needed 1. Three 6 volt 7 AH batteries. The batteries must be approximately 5.94 x 1.34 x 3.94 inches, or (6 x 1 5/16 x 4 inches). If you can't find them localy you can buy the BP7-6-T1 from PowerStream (or the BP8-6H-T1 for 14% more run time.) 2. At least 6 spade terminals, also known as fast-on terminals available from hardware stores or Radio Shack. Get the 3/16" size. 3. A spade terminal crimper 4. Wire, black and red, multistrand 14 to 18 AWG, available from Radio Shack hardware stores, etc. 5. You might also need a couple of crimp splices, pick these up at the same time as the spade terminals. Assembly instructions 1. The 18 volt 7AH Minimoto batteries are now impossible to get. However, a battery with the same characteristics can be made using three BP7-6-T1 batteries. 2.  3. Tape them together with your favorite strong tape. For example strapping tape, duct tape, electrical tape. For convenience, all the terminals should be opposite ends, the front and rear batteries aligned the same with the middle rotated 180 degrees. For clarity the tape isn't shown.  4. Using the wire and spade terminals connect the the center battery to the outer batteries as show, forming an 18 volt battery.  5. The plus and minus of the resultant battery are the unused plus and minus from the end batteries.  6. Cut the old connector off of the old battery, leaving the wires connected to the connector as long as possible. WARNING: cut each wire separately, not both wires together--cutting both wires together can short out the battery, making some smoke and melting the wires. If the wires are long enough to reach where the connector needs to go add spade terminals to them and attach to the battery. You will probably have to lengthen the wires by using the crimp slices and some more wire. 7. Connnect the spade terminals to the battery and install in the toy vehicle. |
||||||
|
|
|
| |||||||||